
Boing Kit – Quick Manual
This is the quick manual for Boing Kit.
For full documentation, see here.
How It Works
Boing Kit provides various workflows to add bouncy effects to objects. Each work flow involves adding specific components to objects (explained below).
For Unity 2018.1 or newer versions, Boing Kit utilizes Unity’s job system to take advantage of parallel processing across multiple CPU cores for better performance (for certain components).
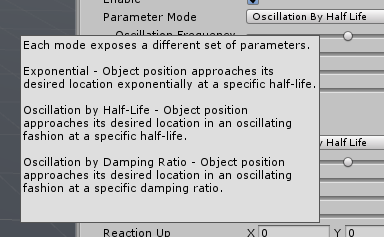
Mouse-over a component’s parameter to see a tooltip for more detailed explanation.
Workflows
Boing Behavior
Add the BoingBehavior component to an object to apply bouncy effects in reaction to change of the object’s transform (position and/or rotation). Modify the object’s transform as usual, and with the addition of the BoingBehavior component, bouncy effects will be applied to the object’s transform.
Boing Effector & Boing Reactor
The BoingEffector and BoingReactor components are used to create bouncy interaction between objects. Add the BoingEffector component to objects meant to “push” others around in a bouncy fashion, and add the BoingReactor component to objects meant to be “pushed” around by effectors.
Boing Reactor Field
The BoingReactorField component adds a grid of cells that react to effectors just like regular reactors. The reactor field is a tool to optimize situations where large amount of reactors are needed: each cell reacts to effectors, and samplers are used to interpolate each cell’s results to apply to objects. Depending on whether the reactor field is running in CPU or GPU hardware mode, add BoingReactorFieldCPUSampler or BoingReactorFieldGPUSampler to objects meant to react to effectors through interpolating cell results from the reactor field.
CPU samplers apply bouncy effects to whole object transforms by interpolating results from reactor fields once per reacting object.
On the other hand, GPU samplers apply bouncy effects to each vertex of each reacting objects through vertex shaders.
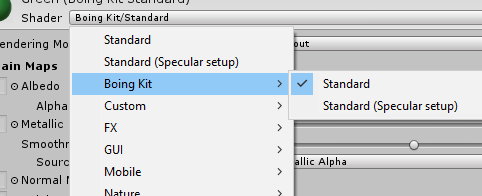
Objects with GPU samplers also need to have a accompanying material with Boing Kit support. Boing Kit already comes with shaders modified from Unity’s standard shaders, which works under Unity’s standard render pipeline.
To make Boing Kit work with custom shaders, as well as shaders under scriptable render pipelines (including URP and HDRP), include BoingKit.cginc in vertex shaders and call ApplyBoingReactorFieldPerVertex or ApplyBoingReactorFieldPerObject to sample from reactor fields (see the Custom Shader example that comes with Boing Kit to see how it’s done in practice).
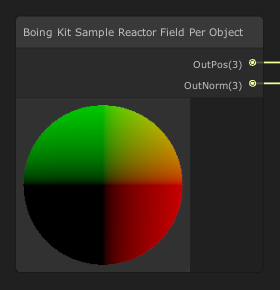
Alternatively, two shader nodes/subgraphs are provided for URP and HDRP, one for sampling reactor fields on a per-vertex basis and one one a per-object basis.
Boing Bones
The BoingBones component applies bouncy effects to skeletal bones or hierarchical object transforms. Bouncy bones are specified using bone chains. Each bone chain includes the specified root bone all the way to bones that don’t have any child or are flagged for exclusion.
Each BoingBones component holds a list of BoingBoneCollider components and a list of Unity’s colliders. The BoingBoneCollider component is Boing Kit’s lightweight implementation of colliders. The user can decide whether each bone chain should collide and react to BoingBoneCollider components and/or Unity’s colliders included in the lists.
NOTE: Due to technical limitations, the effects of the BoingBones component can be displayed properly in only one editor tab. For example, if the scene view tab and the game view tab are both visible, then only one of them will display the effects properly. This only affects the Unity editor and does not affect in-game cameras if there are multiple ones. If there are cameras other than the main camera that render to off-screen render targets, then the effects should be rendered properly.